跳到内容
跳到内容 
A Sunny Day, Some Machine Trouble, and Many Valuable Questions…
Malaga in May is truly stunning. The sea breeze, the warm sunshine, the smell of freshly baked churros…
But inside our customer’s workshop, the atmosphere was less relaxing. There stood two of our proud AMOR 2030 large-format CNC oscillating knife cutting machines, quietly waiting for me. One was already a four-year loyal worker; the other, a shiny new addition.
I was there for a three-day hands-on training. From the first hour, I knew this was not going to be a ‘theoretical talk in the meeting room’ kind of trip. The client had a list of problems they had encountered during production—and they weren’t shy about telling me.

How to Correctly Install the Oscillating Knife Tool and Set Cutting Depth?
Scene at the factory:
When I walked to the old machine, I saw a pile of broken blades on the side. The client joked, “These are our trophies.”
I smiled back, “Trophies of wrong installation, maybe.”
We played our knife installation video, but I still noticed puzzled faces. So, I rolled up my sleeves and showed them, tool in hand.
🔧 Knife Installation 3 Golden Rules (Learned on the Floor, Not in Theory):
| Step | What I Told the Team | Real-World Insight |
|---|---|---|
| Blade Selection | Use a blade 3-6mm longer than the material thickness | For 9mm panels, 12-15mm is sweet spot |
| Correct Insertion | Insert the blade to the bottom, sharp side facing the screw | No wobbling blade = no broken blade |
| Tool Setup | W-axis must be 0, blade points to X+ direction | I made them physically check by hand |
About cutting depth:
The misunderstanding was everywhere. One operator insisted the cutting depth should change with panel thickness.
I explained: Cutting depth = blade tip just touches the table. Period. It has nothing to do with material thickness.
After I adjusted SP4 settings and did a few test cuts together, the ‘aha moment’ finally came.
How to Set Bevel Tool Depth for 6mm V-Groove?
At the customer’s site, I noticed they were really struggling to understand how to set the correct grooving depth—and honestly, many users have the same confusion.
Maybe you’ve also wondered: “Why does my groove depth always feel off?”
Actually, we’ve made a simple tutorial video for this topic, and I always recommend watching it a few times—it really helps clarify the process.
Here’s the key to setting the bevel cutting tool depth correctly:
- First, confirm your groove angle.
Our standard bevel tools come in 0°, 15°, 22.5°, 30°, and 45°.
The same groove depth will need different tool depths depending on the angle, so always check first. - Second, set the knife tip to the table distance.
This is your starting point. - Third, apply this easy formula to calculate the correct depth:
Tool Depth = Knife Tip to Table Distance - (Material Thickness - Desired Groove Depth)
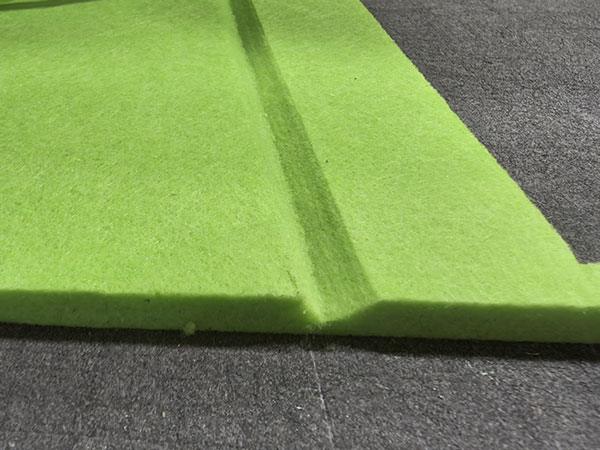
For example:
- Material thickness: 9mm
- Desired groove depth: 6mm
- Knife tip to table distance: 35mm
Calculation:35 - (9 - 6) = 32mm
That’s the tool depth you should set.
Once you understand this formula, setting the groove depth becomes simple and accurate every time.
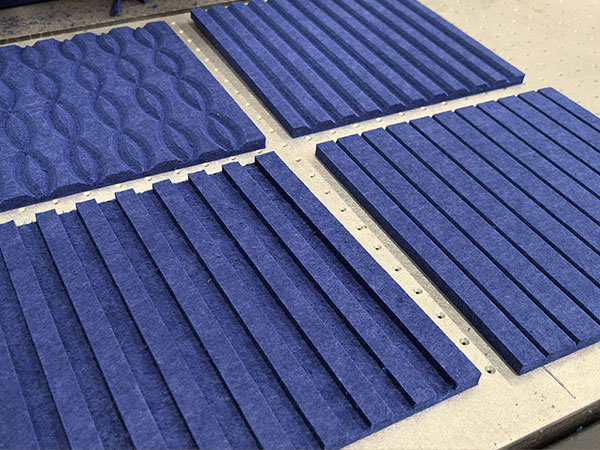
SP3 vs SP5 – The ‘Twins’ That Confuse Everyone
This topic sparked quite a discussion at the workshop.
I explained:
- SP3 is strictly for straight grooves.
- SP5 is the all-rounder—it does straight, curves, and circles.
- In your design:
- SP3 requires only one line.
- SP5 needs two overlapping lines facing opposite directions.
I even drew them on the floor with chalk (yes, on the floor).
Sometimes, you’ve got to make it visual to make it click.
How to Set Cutting Speed Without Breaking Blades?
Before I arrived at the customer’s site, they often faced a frustrating problem—frequent blade breakage.
At first, they suspected the blade was too thin or of poor quality.
But once I checked their machine settings on-site, the real reason became obvious: their cutting speed was set to extreme levels.
Here were their settings:
- Straight speed: 700mm/s
- Acceleration: 2500mm/s²
- Arc speed: 60%
- Small circle speed: 40%
To put it simply—that’s like stepping on the gas and reaching 100km/h in just 1 second, then trying to drive at 180km/h all day long.
No wonder the blades couldn’t handle it.
So, how should we set the cutting speed properly?
First, it’s important to understand:
- Faster isn’t always better, especially if you ignore material density, thickness, and the blade’s endurance.
- Machines can run empty at speeds of 1500-2000mm/s, with acceleration up to 2500-3000mm/s².
- But during actual cutting, speeds must be adjusted based on the material and the job.
Recommended cutting speeds (Example for 9-12mm polyester fiber acoustic panels):
- Straight line speed: 300-500mm/s
- Acceleration: 1000-1500mm/s²
- Arc speed: 60-70% of straight speed
- Small circle speed: 30-40% (for circles smaller than 30mm in diameter)

What does each speed setting mean?
Small circle speed:
Specially for cutting small circles.
The control panel lets you set a circle diameter threshold (default is 30mm)—any circle smaller than this will automatically be cut at the slower small circle speed to protect the blade and ensure precision.
Straight line speed:
The speed the machine moves when cutting straight lines—think of driving fast on an open highway.
Acceleration:
The time the machine takes to reach its max cutting speed.
Higher numbers mean faster acceleration—like a car reaching 100km/h in fewer seconds.
Arc speed:
The machine slows down when turning corners, just like you do when driving through curves.
How to Maintain the Machine and Tools?
WhWhen I arrived at the customer’s workshop, the moment I heard the loud, rough sound of the old machine running, I knew right away: this machine hadn’t seen proper maintenance for a long time.
Even the oscillating tool sounded like it was shouting for help.
I walked up, touched the guide rails and rack by hand—they were completely dry.
That confirmed my suspicion: no lubrication, no cleaning, no care.

So, how should you maintain your machine to keep it healthy and precise?
1. Daily Maintenance (After Every Shift)
- Use an air gun to clean the table and the bottom of the tool, removing dust and debris from the cutting process.
- This prevents buildup that can damage parts and reduce precision.
2. Weekly Maintenance
- Tool maintenance:
- At the end of each week, drip light sewing machine oil (must be clear and low-viscosity) into the tool.
- Invert the tool and let it oscillate for 1 minute to fully lubricate the inside.
- Then place it back in normal position, vibrate for another minute to expel excess oil—this avoids oil leaking onto materials during cutting.
- Guide rail lubrication:
- Use the manual oil pump on the back of the machine to lubricate both sides of the X-axis guide rails.
- Run the machine along the X-axis after oiling to spread the lubricant evenly.
- For Y and Z-axis guide rails and lead screws, use a small brush to manually apply oil, keeping the surfaces moist.
3. Monthly Maintenance
- Every 20-30 days, apply a small amount of grease to the X and Y-axis racks every 60cm.
- Do not over-grease—just enough to keep it lubricated.
Additional Tip:
If you notice the cutting accuracy drops over time, check the X and Y-axis for play or looseness.
Tighten screws and check mechanical clearances to maintain precision.
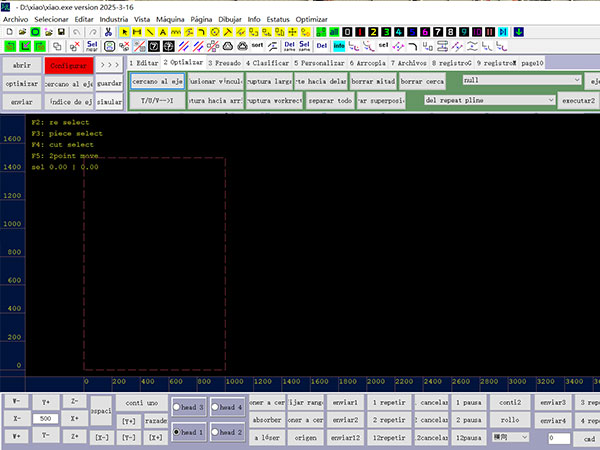
How to Set the Machine Panel and Software to Spanish?
Many customers ask us, “Can the machine speak our language?”
Of course! To make operation easier, our control panel supports English, Spanish, Korean, Russian, Italian, French, Portuguese, and Chinese. This way, your team can work more confidently without the language barrier.
Even better, our software has an open language system.
You can translate the English instructions into your language, drop the file into the software folder, and the machine will switch to your preferred language—simple and hassle-free.
After all, using the machine should feel easy, not like learning a foreign language.adaches.
Because, let’s be honest—machines are complex enough, the last thing you want is to struggle with the language too.
How to Let One Operator Manage 4 Machines?
During my visit, the customer told me they had once visited China and were amazed to see one operator managing four CNC machines at the same time. Naturally, they asked me, “How can we do the same?“
This is a question I hear often from customers. After all, everyone wants to reduce labor costs and improve efficiency.
So, is it possible for one person to handle four machines?
Yes, it is.
But let me be clear—it doesn’t happen overnight.
Here’s what I always tell customers:
- Start by training 3-4 employees.
Why? Because everyone has different strengths. Some may be better at software, others might have a natural feel for machine operations. - Observe your team during the training phase.
In this case, I trained 3 employees:- One was excellent at design and software.
- One had a balanced skillset—good at both software and machine handling.
- One was naturally skilled at machine operation and hands-on tasks.
- Identify the best fit for the job.
Once you see who is the fastest learner, the most organized, and the most comfortable handling multiple machines—you can assign them to take full responsibility for operating several machines.
My advice?
Don’t rush.
Give your team enough time to practice and grow.
Skill comes with time, not with pressure.
Let them figure things out together at first. Encourage them to discuss and learn from each other.
Then, when the right person naturally stands out—you’ll know it’s time to trust them with more.
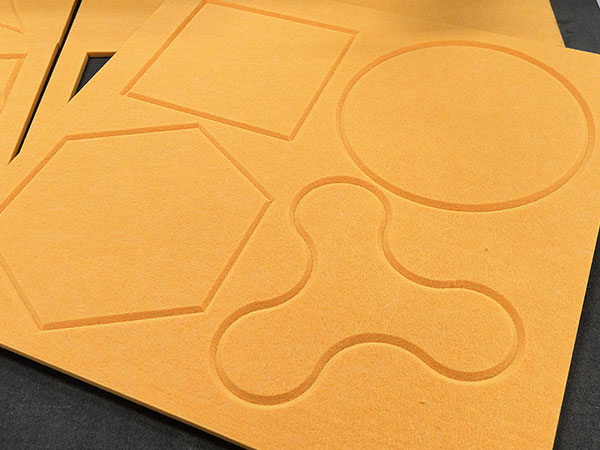
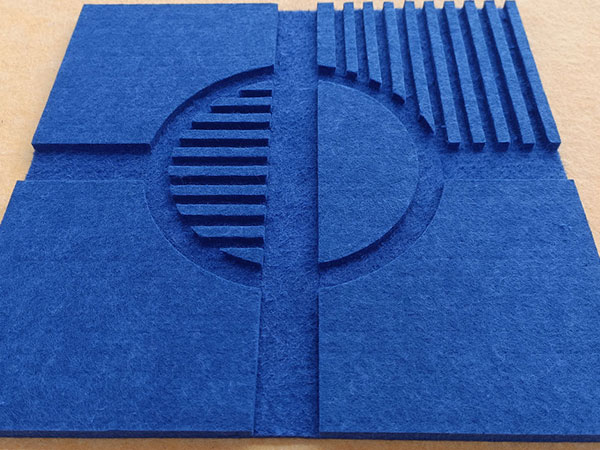
How to Fix Curved and Circular Grooving Issues?
Have you ever faced this issue?
When using the bevel cutting tool to groove curves or circles, the tool keeps going up and down in place but never completes the groove properly.
This is a common mistake and usually happens for two reasons:
- Wrong SP operation number:
For any curved or circular grooving, you must use SP5.
SP3 is only for straight line grooving.
Using SP3 for curves will confuse the machine and cause errors. - Incorrect tool offset value in the control panel:
The offset setting for the bevel cutting tool should always be zero.
(If you’re familiar with the machine, you’ll know exactly what this means—any number other than zero will cause problems in circular or curve paths.)
But what if you can’t adjust the offset directly in the control panel?
No worries—you can optimize it in the design software instead.
When creating your groove lines, adjust the line slightly to the left or right based on the cutting direction.
This ensures the two lines meet correctly without crossing or leaving gaps.
Bonus Tip: How to Fix the ‘Not Closing’ Problem in Circular Grooving
Many customers also face another issue when grooving circles—the start and end points don’t align perfectly, leaving a tiny gap.
Here’s the easy fix:
- Adjust the V-groove starting angle in the control panel.
- For example, if your groove is at 45°, try setting the starting angle to 38° or 42°.
- This small adjustment will help the start and end points close seamlessly.
How to Improve Suction on Polyester Fiber Panels?
If you’ve worked with polyester fiber acoustic panels, you’ll know—they breathe like sponges.
That means vacuum pumps struggle to hold them down properly during cutting, and the material can easily shift.
At first, we tried the old-school approach—adding more power.
We gave the customer two 7.5KW vacuum pumps, thinking that should do the job.
Sure, it helped a bit, but not enough—and the electricity bill? Let’s just say it wasn’t small.
So, what next?
We got creative.
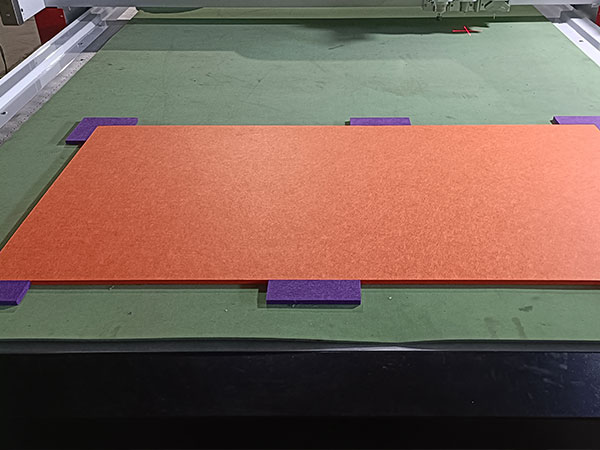
The customer started using felt blocks glued with hot melt glue at the four corners of the material to keep it in place.
It worked… until the material size changed.
Then they had to move the blocks, glue again, adjust again—it became a bit of a headache.
That’s when we introduced the real game-changer—our clamping membrane system.
This clever system moves along with the machine beam, automatically opens and closes, and clamps the material firmly—no matter the size.
No more hot glue. No more shifting panels.
The customer loved it so much they’re now planning to upgrade their old machine with the same system.

Why Does the Square Cut Not Close or Overcut?
One of the operators came to me during the training and asked,
“Why do we always get this problem when cutting squares—one side cuts too much, but the other side doesn’t even close properly?”
I smiled and told him, “Ah, that’s a classic. This is what we call a cutting compensation issue.“
You see, every blade has its thickness. When the tool goes down to start cutting and then lifts at the end, without proper compensation, you’ll either overcut or leave a gap.
That’s why your machine has cutting compensation settings.
Let me explain it in plain language:
- On the control panel, hit the ‘Configuration’ button, and you’ll see the adjustment screen.
- Drop Compensation:
This controls the entry point when the blade first drops.- If you see the cut is too big or goes over the line—reduce this value.
- If the cut doesn’t close—increase it.
- Lift Compensation:
This controls the exit point when the blade lifts after finishing the cut.- Same rule: if it cuts too much—reduce the value.
- If the cut doesn’t close properly—increase it.
It’s a bit like parking your car—you want to start and finish at the exact spot.
Too much compensation, and you overshoot. Too little, and you stop short.
Once you get the feel for it, your squares will be perfect every time.
Conclusion: Machines Don’t Talk, But They Tell Stories
This trip to Malaga reminded me:
Machines might be cold metal, but the people using them—and their real-world challenges—are always warm and lively.
Through these 10 questions and answers, I hope more customers feel like they have a friend next to them when facing these everyday CNC challenges.
If this article helped you—share it with your team, and let’s make CNC cutting a bit more human, one problem at a time.