Carbon fiber prepreg is expensive, sticky, and easy to ruin. A weak setup turns one DXF file into a pile of scrap.
A workable prepreg cutting setup uses cold cutting + correct blade geometry + stable vacuum (7.5 kW, 8 zones) + a 1600×2500 mm working area for most shops, plus continuous feeding for rolls to keep accuracy and edge quality stable.
I see many buyers chase the “best machine brand.” I do not start there. I start with repeatability. I want the same result on Monday and Friday, with normal operators. If you want fewer rejects, fewer arguments, and cleaner edges, keep reading.
Which prepreg are you cutting, and why does it change everything?
Many factories call everything “prepreg.” That mistake wastes material.
You should identify prepreg type first because UD, woven, and multiaxial behave differently under a blade, and each one needs different vacuum, blade, and speed logic.
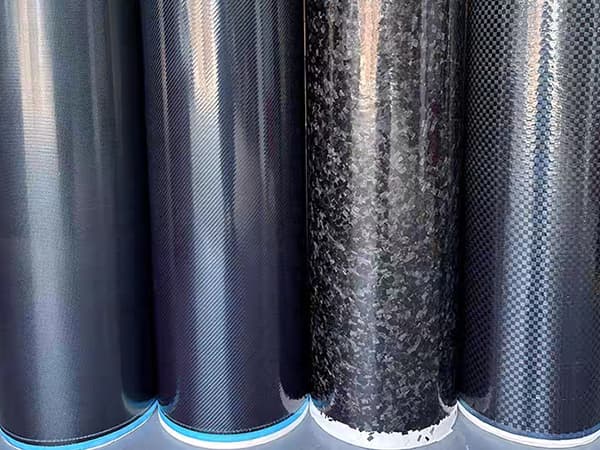
UD vs woven vs multiaxial: what really changes?
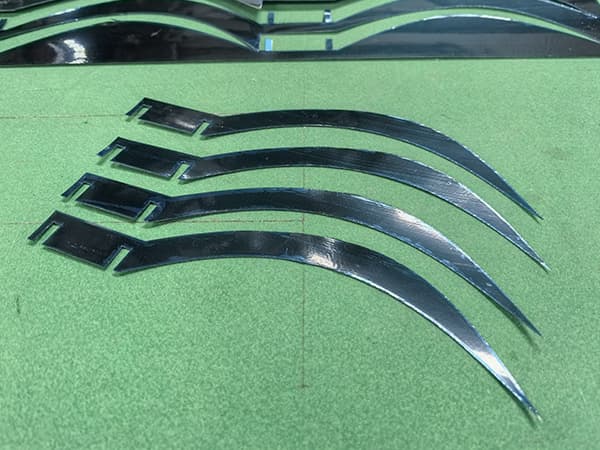
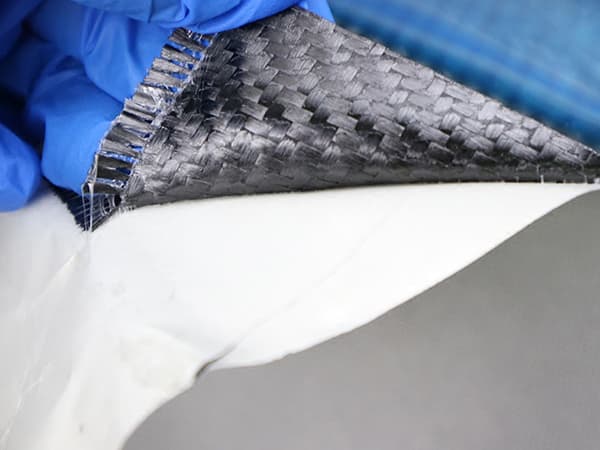
UD prepreg tears more easily along the fiber direction. I usually reduce corner speed and use smoother lead-ins for UD. Woven prepreg frays more on the edge, so I focus on blade sharpness and exit quality. Multiaxial stacks shift more because layers fight each other, so I increase hold-down and reduce fast direction changes.
Resin and tack: the variable people ignore
Tack changes cutting resistance. When tack is high, the blade “sticks,” and the sheet can stretch. When tack is low, the sheet slides under weak vacuum. I always treat tack as a setting input, not as a small detail.
My 20-second material ID checklist
I always confirm four items before I build a cutting process:
- Fiber structure: UD / woven / multiaxial
- Sheet thickness and liner type
- Storage temperature and cutting temperature
- Orientation rules for layup
This step prevents most “unexpected” defects later.
Should you cut at room temperature or under cooling control?
Prepreg performance changes fast with temperature. Operators feel it, but they do not measure it.
You should control temperature because cooler prepreg has lower tack, lower drag, and lower stretch, which improves size stability during long cutting runs.
Why temperature changes your dimensions
I have seen the same shape cut clean in the morning and start to deform later in the day. The machine did not change. The prepreg did. Warmer prepreg becomes softer and stickier, and the blade creates more pulling force. That pulling force causes small parts to drift, and it also damages edges.
A practical workflow that keeps production fast
I keep it simple:
- I reduce the time the sheet stays on the table before cutting starts.
- I keep unused prepreg covered to avoid heat pickup.
- I keep airflow stable around the cutting area.
- I use the same “cutting window” after the roll leaves storage.
These habits reduce variability without adding complex equipment.
What I tell buyers who demand one universal parameter
I tell them one truth: no parameter is universal, but a stable process is repeatable. I build the process around material behavior, not around wishful thinking.
Should you cut through the release liner, or peel it first?
The liner can either stabilize the sheet or increase drag.
You should choose liner strategy based on stability and residue, because cutting through liner improves stiffness and vacuum stability, but peeling first reduces film drag and blade gumming.
The trade-off: stability vs resistance
- If I cut through the liner, the sheet is more stable and flat. Vacuum hold is usually stronger.
- If I peel first, resistance can drop and edges can look cleaner on some fabrics.
But peeling first can increase micro-shift when vacuum is weak.
My default for first trials
For new operators and first production trials, I usually start with cut-through liner because it gives stability. After the first stable result, I test peel-first if the customer needs the cleanest edge.
Decision table (quick and useful)
| Your main problem | Better choice | What improves |
|---|---|---|
| Parts shift or rotate | Cut through liner | Higher stiffness + stronger hold |
| Blade gums fast | Peel first | Less film residue |
| Edges show fuzz | Peel first | Cleaner fiber exit |
| Sheet lifts on corners | Cut through liner | Better vacuum stability |
Which blade works best for prepreg cutting?
A bad blade makes a good machine look unstable.
For carbon fiber prepreg, I recommend a 0.63 mm thickness, 25° sharp-point blade for most woven and UD prepreg cutting, because it reduces cutting resistance and reduces stretching force on the sheet.
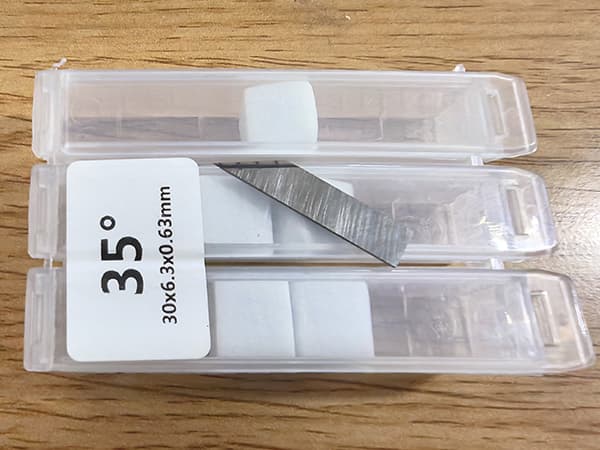
Why 0.63 mm thickness and 25° angle works well
I do not choose this blade because it “looks sharp.” I choose it because it changes the cutting mechanics:
- 0.63 mm thickness improves stiffness, so the tip does not flex on curves.
- A 25° sharp-point reduces the contact area, so the blade enters with less drag.
- Lower drag means the blade pulls less on the prepreg surface.
- Lower pulling force reduces material stretch and edge fuzz.
Blade length rule that prevents flex
I keep the blade extension only slightly longer than needed. When the blade is too long, it flexes and causes size drift on corners. When it is too short, it creates incomplete cut-through.
What I do when resin builds up
Prepreg can leave resin on the blade. Film liners can leave glue. I set a fixed routine:
- I keep spare blades ready.
- I clean blades at a fixed interval, not only when defects appear.
This prevents “sudden quality drops” mid-shift.
What machine size and feeding setup actually fits prepreg production?
If you cut prepreg in rolls, manual loading is slow and unstable.
For carbon fiber prepreg roll cutting, I recommend a 1600×2500 mm standard working area plus an automatic feeding system for continuous cutting, because it supports common roll widths while keeping the workflow simple and fast.

Why 1600×2500 mm is a practical standard
I recommend 1600×2500 mm because:
- It covers common sheet cutting jobs.
- It fits most factories without special foundations.
- It matches production needs for prototyping and batch cutting.
- It reduces the risk of “overspending on size” while still meeting most real orders.
Why automatic feeding changes stability, not just speed
Automatic feeding is not only about speed. It is about consistency:
- The system keeps tension stable on long rolls.
- The table always receives material in the same direction.
- Operators do not need to reposition and re-square the roll every time.
This reduces cumulative error in long production runs.
A practical “roll workflow” structure
I use this logic for roll work:
- Feed → vacuum hold → cut → advance → repeat
When the workflow is stable, nesting and part sorting also become easier.
How do you build a vacuum hold-down that does not fail mid-job?
If the sheet moves, the best blade is useless.
For prepreg cutting, I recommend a 7.5 kW vacuum pump with 8 vacuum zones, because it gives strong and controllable adsorption, and zoning prevents suction loss on empty table areas.

Why 7.5 kW is a good baseline
I use 7.5 kW as a baseline because prepreg + liner can leak air, and carbon fiber fabrics can be “micro-porous.” A smaller pump often causes small shifts, especially on high-speed contours.
Why 8 zones improves real production
Zoning matters because:
- You only open zones that cover the material.
- You keep suction strong where cutting happens.
- You reduce airflow loss on unused areas.
This improves hold-down and reduces scrap caused by micro-shift.
What I check when customers say “vacuum is enough”
I check airtightness first: seals, hoses, and zone covers. A strong pump cannot fix a leaking system. This is not theory. This is daily factory reality.
What cutting tool delivers a truly smooth cross-section on prepreg?
Prepreg is sensitive. The tool must be fast and stable.
For carbon fiber prepreg, I recommend either a drag knife or a high-frequency electric oscillating tool above 15,000 strokes/min, because higher oscillation reduces resistance and improves edge smoothness.

Why “>15,000/min” matters
When oscillation frequency is high:
- The blade cuts with smaller “push” force.
- Resistance drops during curves and small features.
- The fiber exit becomes cleaner.
- The cut cross-section becomes smoother, especially on woven prepreg.
Drag knife vs high-frequency oscillation: when I choose which
- I choose drag knife when the prepreg is flexible and the shapes are smooth.
- I choose high-frequency oscillation when the shapes have many curves, tight radii, or when the customer demands the cleanest edge on woven fabrics.
Quick reference table (not too long, but useful)
| Material behavior | Best tool | Key reason |
|---|---|---|
| High tack, easy stretch | High-frequency oscillation (>15,000/min) | Lower cutting resistance |
| Smooth contours, long lines | Drag knife | Stable and fast |
| Tight radii, small parts | High-frequency oscillation (>15,000/min) | Cleaner corner exit |
| Mixed jobs, unstable operators | High-frequency oscillation | More forgiving |
What toolpath rules keep parts accurate and easy to sort?
A good toolpath reduces defects even before you touch settings.
You should apply lead-in, cut order, and corner speed rules because these rules reduce fiber pull-out and reduce part movement after release.
Corner control is the first stability switch
I slow corners before I slow straight lines. Most defects start at corners. When the blade turns, the sheet feels the highest pulling force. If I reduce corner speed, edges clean up fast.
Inside-first cutting rule
I cut internal features first. I cut the outer contour last. This keeps the part stable until the final moment.
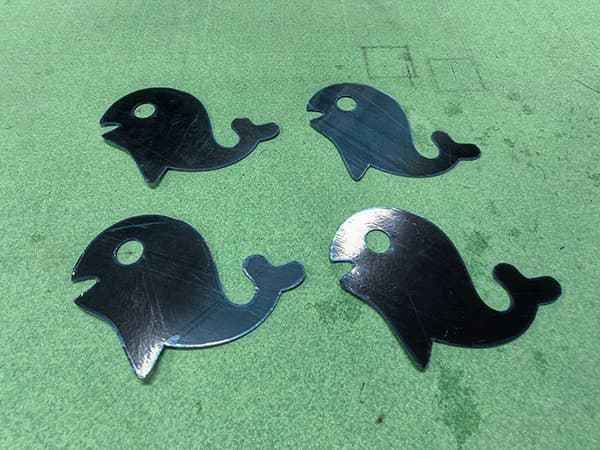
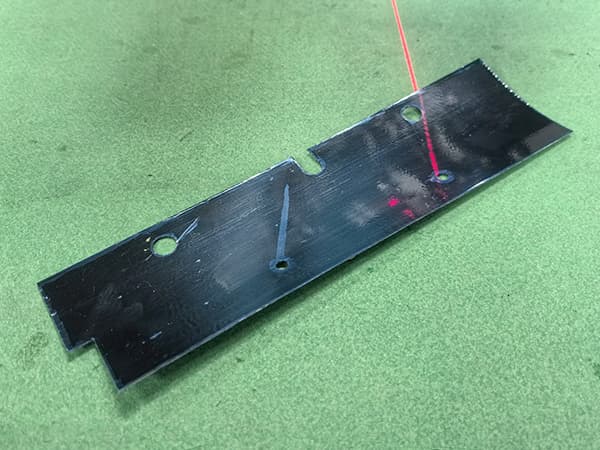
Marking and ID for layup
I add basic part IDs and alignment marks when needed. This reduces mix-ups and saves time in layup.
Conclusion
Stable prepreg cutting comes from data: blade geometry, vacuum power, zoning, feeding, and high-frequency cold cutting.