跳到内容
跳到内容 
Bad tool choice can turn a good CNC gasket cutting machine into a slow, messy, expensive headache.
If you cut rubber, non-asbestos, or graphite gaskets, the cleanest cut comes from matching tool type + power + amplitude + frequency to material hardness, thickness, and behavior, not from guessing by “higher power is always better.”

Before you read further, please stop thinking “one oscillating tool fits all,” because that mindset burns time, blades, and money—keep reading.
Why do most buyers choose the wrong tool package?
Many buyers compare bed quality and accuracy, but they ignore tooling until the machine arrives.
Most tool mistakes happen because buyers focus on specs like frequency and power, but they forget the gasket material fights back in different ways.
The hidden reason tool choice decides your real production result
Buyers care about three things, and tooling controls all three
I hear the same three priorities in almost every inquiry for a CNC gasket cutting machine: processing efficiency, operating cost, and edge smoothness. A strong machine frame helps, but tooling decides what you get on the table every day.
- If you choose the wrong tool, the machine must slow down to stay stable.
- If you choose the wrong amplitude, the material stretches or tears, and the edge becomes rough.
- If you choose the wrong power, the blade drags, heats up by friction, and wears fast.
So yes, frequency matters, and power matters, but the real question is: does this tool match your gasket’s hardness and thickness without pulling the material?
A quick “tool-first” checklist I use before I recommend anything
I always lock three material facts before I lock the tool package:
- Hardness (soft rubber vs vulcanized rubber vs rigid sheet gaskets).
- Thickness range (are you living in 1–3 mm, or jumping between 1 mm and 30 mm?).
- Material behavior (does it stretch, crack, delaminate, or crumble?).
If a buyer skips these three, they usually buy the wrong tool and then blame the machine.
Before you read further, please stop comparing tools like smartphone chips—materials decide the winner, not marketing—keep reading.
Electric vs pneumatic oscillating tools: what is the real difference?
If you only look at frequency, you will misjudge the tool by a mile.
If you look at how the tool pushes and how the blade moves through the material, the choice becomes simple.

The practical meaning of frequency, power, and amplitude
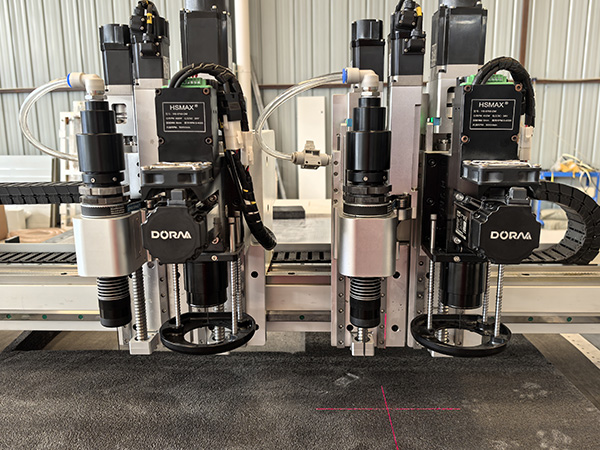
Electric oscillating tools: stable control and clean edges
When I talk about electric oscillating tools, I break them into two common groups:
- Standard electric oscillating tool (typical 15,000 cycles/min)
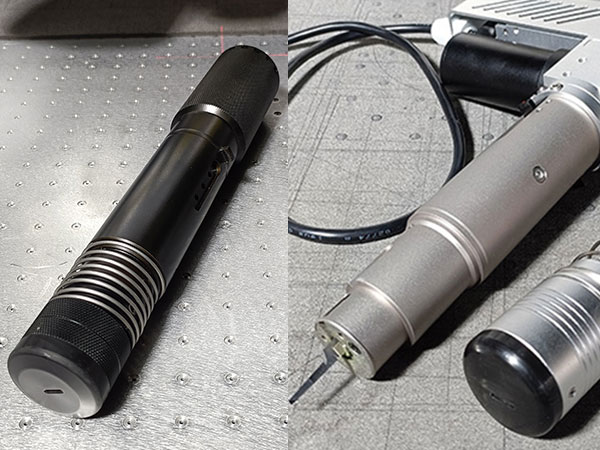
This tool can run fast on suitable materials. In the best conditions, it can reach up to 1000 mm/s on easy-cut sheets. I do not promise this speed for hard gaskets, but it shows the ceiling when the material allows it. - 400W servo-driven high-power electric oscillating tool
This is my first choice for high-hardness gasket sheets where penetration stability matters more than headline speed. It delivers the strongest drive and holds cutting behavior steady.
Pneumatic oscillating tools: big amplitude for soft materials
A pneumatic oscillating tool often gives you a larger amplitude, like 8 mm, which helps the blade “walk” through soft and elastic materials. This is useful when the material wants to grab the blade.
But amplitude is not a free gift. If the material is too rigid, big amplitude can increase vibration load, raise risk of micro-chipping on the edge, and push you into slower, less stable cutting.
A simple visual I use with buyers (not scientific, but very useful)
Speed potential (when material allows):
- Electric (15,000/min): ██████████
- 120W high-frequency electric: █████████
- Pneumatic (8 mm amplitude): ███████
- 400W high-power electric: ██████ (lower speed, higher stability on hard sheets)
This is why I never choose tools by one number. I choose them by material behavior under the blade.
Before you read further, please stop asking “which tool is better,” and start asking “which tool is better for my material”—keep reading.
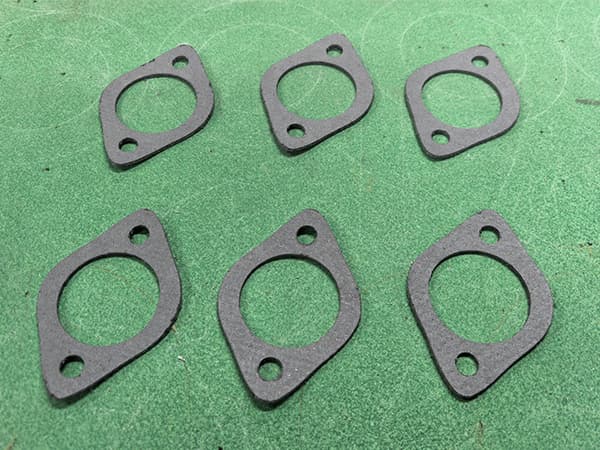
How do I choose tools for hard gaskets like non-asbestos, PTFE, and graphite?
Hard gaskets punish weak drive and bad settings.
A stable cut at a realistic speed beats an unstable cut at a “nice-looking” speed.
Hard gasket rule: stability first, then speed
The hard-material limit you must respect
For many rigid gasket sheets, the practical “safe zone” for oscillating cutting is not unlimited thickness. In real production, I treat 3–6 mm as the thickness window where tool choice becomes critical and stability becomes the first KPI.
If you cut non-asbestos sheet gaskets or PTFE (Teflon) gaskets in the 3–6 mm range, I normally recommend the 400W servo-driven electric oscillating tool first. In daily work, I usually set the working speed around 30–60 mm/s for stable production.
Some buyers say, “30–60 mm/s sounds slow.” I always answer the same way: hardness already decided the game. If you can cut 3–6 mm rigid gaskets steadily without edge damage, you already made a smart choice.
When pneumatic can still work on “hard materials”
Even on the same material family, thickness changes the tool choice.
- If you cut 1–2 mm hard gasket sheet, a pneumatic oscillating tool can still run stable. In many cases, it can reach 80–120 mm/s while keeping the cut under control.
Where the 120W high-frequency electric tool becomes the efficiency king
If your non-asbestos gasket sheet is 0.1–0.8 mm, I often recommend a 120W electric oscillating tool with about 1.5 mm amplitude and a higher vibration frequency. A common working speed range is 200–300 mm/s, and edge quality can be excellent when your vacuum hold-down is correct.
My realistic tool package for hard gaskets
Many factories do not cut only one thickness. So I often propose a combo:
| Hard Gasket Thickness | Recommended Tool | Typical Working Speed | Why I Pick It |
|---|---|---|---|
| 0.1–0.8 mm | 120W high-frequency electric | 200–300 mm/s | High efficiency + smooth edge |
| 1–2 mm | Pneumatic oscillating | 80–120 mm/s | Stable cut with good output |
| 3–6 mm | 400W high-power electric | 30–60 mm/s | Best stability on rigid sheets |
This is how I protect both edge quality and blade cost in real production.
Before you read further, please stop chasing the highest speed number for hard gaskets—your best speed is the one that stays stable all day—keep reading.
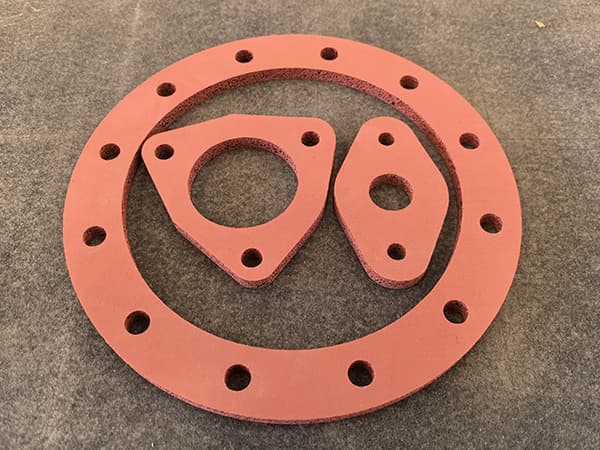
How do I choose tools for rubber gaskets across 1–30 mm thickness?
Rubber is not one material. Rubber is a family of behaviors.
If you cut the wrong rubber with the wrong tool, the edge will tell the truth.
Rubber gasket rule: thickness span decides the tool package
Case 1: thick vulcanized rubber sheet (10–30 mm)
If you cut high-hardness vulcanized rubber in 10–30 mm, I usually recommend the 400W electric oscillating tool and I prefer 10 mm amplitude for strong penetration behavior. A common working speed range is 20–60 mm/s.
This setup is popular because it is stable, and it keeps operating cost reasonable. A stable cut reduces re-cuts, and re-cuts are the real cost killer.
Case 2: medium rubber sheets under 12 mm (NBR / neoprene)
If you cut NBR (nitrile rubber) or neoprene under 12 mm, a pneumatic oscillating tool is often a strong choice. I often see stable working speeds around 120–150 mm/s when the hold-down is correct and the blade is sharp.
This is where pneumatic’s amplitude helps, because these rubbers can be elastic and they like to “pull” the blade.
Case 3: thin rubber sheets (1–5 mm) and the smoothest edge goal
If your main product is 1–5 mm rubber gaskets and you want the best cut surface, I often recommend a 120W electric oscillating tool. This tool can produce a very smooth edge when the parameters match the rubber hardness and the blade is correct.
In this thickness range, buyers usually want three wins at once: speed, edge, and blade life. The 120W tool often gives a good balance, especially for factories doing many small custom orders.
A simple rubber decision matrix I give to procurement
- If thickness span is huge (1–30 mm): you need at least two tools.
- If rubber is thick and hard: power + stability wins.
- If rubber is medium and elastic: amplitude helps.
- If rubber is thin and edge quality is premium: controlled electric cutting wins.
Before you read further, please stop treating rubber thickness like a small detail—it is the reason you need one tool or two—keep reading.
How do I optimize for efficiency, cost, and edge smoothness at the same time?
You cannot maximize all three with one tool if your materials vary.
But you can build a tool package that keeps all three under control.
A balanced tool strategy for real factories
Step 1: group your SKUs into three thickness buckets
I do not start with “rubber vs non-asbestos vs graphite.” I start with thickness behavior:
- Thin bucket: 0.1–2 mm
- Middle bucket: 2–12 mm
- Thick bucket: 10–30 mm (yes, overlap is normal)
This thickness view is practical because it directly links to speed and stability.
Step 2: match each bucket to the tool that protects edge quality
Then I map tool choice:
- Thin bucket: 120W electric oscillating tool (high efficiency + smooth edge)
- Middle bucket: pneumatic oscillating tool (good output on elastic sheets)
- Thick bucket: 400W high-power electric tool (stable penetration)
Step 3: reduce operating cost by protecting blade life
Blade cost is not only “price per blade.” It is “price per good part.”
I reduce blade cost in three ways:
- I keep speed realistic for hard sheets.
- I avoid forcing pneumatic tools into rigid materials.
- I keep a second tool ready for thin parts, so the 400W tool is not abused on thin sheets.
A compact comparison table for buyers (keep it simple)
| Goal | Best Tool Direction | What I Avoid |
|---|---|---|
| Higher efficiency | 120W electric / standard electric | Overpower tool for thin sheets |
| Lower operating cost | Stable tool + fewer re-cuts | “Fast but unstable” parameters |
| Smoothest edge | Controlled electric cutting | Stretching material with wrong amplitude |
Quick visual: what most buyers actually pay for
Operating cost drivers (typical factory reality):
- Re-cuts & scrap: 🟦🟦🟦🟦🟦🟦
- Blade wear: 🟦🟦🟦
- Labor handling time: 🟦🟦
- Energy use: 🟦
This is why tool choice matters more than most people expect. A correct tool package reduces scrap first, and scrap is the most expensive “silent cost” in gasket production.
Before you read further, please stop buying tools as accessories—tools are the production system—keep reading.
Conclusion
I choose tools by gasket hardness, thickness, and behavior, because the right tool package delivers stable speed, low cost, and a cleaner cut edge.