Welcome to the world of precision cutting with the AMOR CNC oscillating knife cutting machine! As an AMOR engineer, I’m here to guide you through the essential steps to get you up and running with your new machine. Don’t worry, we’ll keep it light-hearted but serious enough to ensure you get those perfect cuts. Let’s dive into the three core operations you need to master.
Step 1: Correct Installation of Tools and Blades
First – let’s get that blade installed properly. It is like fitting a sword into its sheath; precision is key.
1.1 Blade Installation:
Center Alignment: Ensure the blade tip is perfectly centered. The cutting edge should face the direction of the fixing screw. Imagine you’re aligning a dart before throwing it – it has to be straight!
Blade Insertion: Insert the blade fully into the tool holder until it hits the bottom. No half-hearted attempts here; make sure it’s in all the way.
Securing the Blade: Tighten the fixing screw using a wrench. Here’s a tip: use the shorter side of the wrench to avoid over-tightening and damaging the screw. Picture it as a firm handshake, not a bone-crushing grip.

1.2 Tool Installation on the Machine:
W-Axis Coordination: Set the W-axis coordinate to zero to ensure the rotary axis is at the zero position. This is like setting your GPS to start from home.
Tool Placement: Rotate the tool’s fixing bolt counterclockwise to raise it. Vertically insert the tool into the tool holder. Think of it as placing a key into a lock.
Blade Orientation: Make sure the blade faces the X+ direction of the machine. It’s like making sure the key is turned the right way before you turn the lock.
Securing the Tool: Tighten the tool’s fixing bolt to secure the tool in place. You’re all set!

Consequences of Incorrect Installation:
Misalignment can lead to inaccurate cuts and potential damage to both the blade and the machine.
Improper tightening can cause the blade to loosen during operation, leading to safety hazards and poor cutting quality.
Step 2: Setting the Cutting Depth
Setting the cutting depth is like tuning a guitar – get it right, and everything sounds (and cuts) perfectly.
Initial Setup:
Place an A4 sheet flat on the machine’s table.
Move the tool to the area above the A4 paper.
Selecting the Correct SP Operation Number:
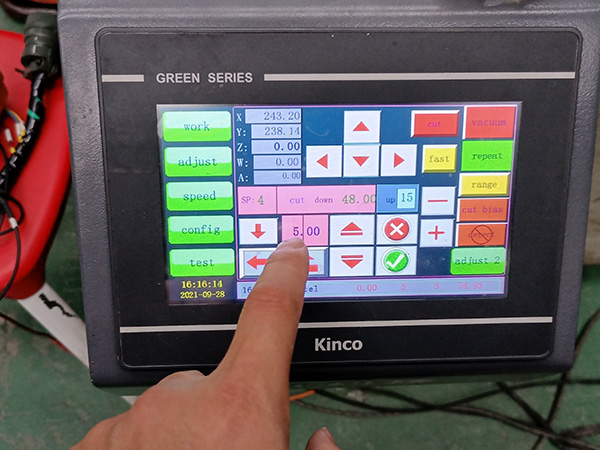
On the control panel, go to the “Adjust” interface.
Select the correct SP operation number for the tool. Each tool’s corresponding SP operation number is marked on the tool itself. Use this marking to select the appropriate operation number.

Adjusting the Cutting Depth:
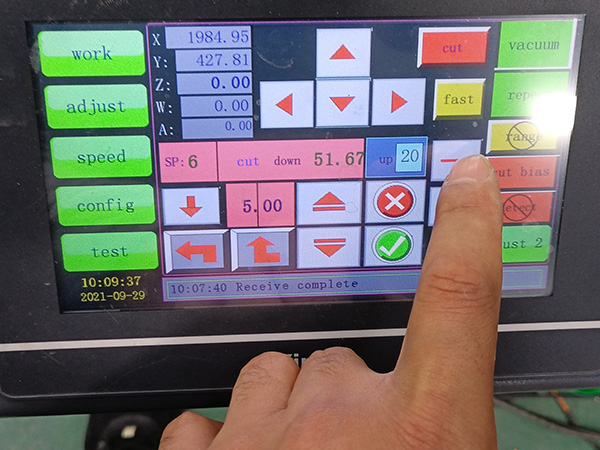
Click “Adjust” and then click the “Cut” button to activate the oscillating mode.
Set the tool’s descent increment to “5” and click the downward button in steps. Observe the distance between the blade tip and the A4 paper as it descends.
When the blade tip is close to the paper, reduce the descent increment to “1” and continue clicking the downward button.
Once the blade tip is very close to the paper but hasn’t pierced it, set the descent increment to “0.1”. Continue clicking the downward button and check by sliding the paper to ensure it is just being scored.

Saving the Depth Setting:
When the blade just starts to cut the paper, click “√” to save the cutting depth parameter.
Testing the Cutting Depth:
Place the actual material to be processed on the table.
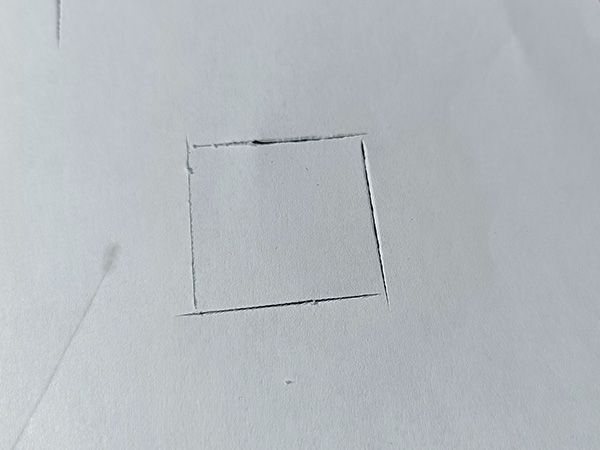
Move the tool above the material and click the “Counterclockwise Rotate” button. The machine will automatically cut a square.
After cutting, check if the material is fully cut through.
Fine Adjustment:
If the material is not cut through, fine-tune the cutting depth. Set the required adjustment increment, then click the “+” button to increase the cutting depth. Test again by cutting another square until the material is perfectly cut through.

Step 3: Optimizing Cutting Patterns in Control Software “Xiao”
Finally, we get to play with the software. Think of it as setting up a video game character – you want everything just right before you start.
Opening the Graphic File:
Open the DXF or PLT format graphic file that needs processing in the “Xiao” control software. Note that the graphic cannot be directly sent to the machine for processing at this stage.
Selecting the Graphic and Setting the SP Operation Number:
Select the graphic that needs to be processed.
Choose the correct operation number for the selected graphic in the SP operation number setting area. You will notice the color of the graphic changes, indicating that the setting was successful.

Aligning the Graphic to the Zero Point:
Click the “Align to Zero Point” button to move the graphic close to the set starting position.
Sending the Graphic to the Machine:
Click the “Send” button to send the processed graphic to the machine. The graphic is now ready for processing.

Processing Different Operations:
If the graphic only involves cutting, follow the above steps for a quick setup.
If the graphic involves multiple processes, such as cutting, grooving, or milling:
Select the part of the graphic corresponding to each process.
Set the SP operation number for each process sequentially.
Ensure each part of the graphic is assigned the correct SP operation number before sending it to the machine.

By mastering these three core operations, you will have a solid foundation for using the oscillating knife cutting machine. Stay tuned for our next article, where we will cover setting the cutting starting point, adjusting processing speed, and addressing overcut issues caused by tool width.


